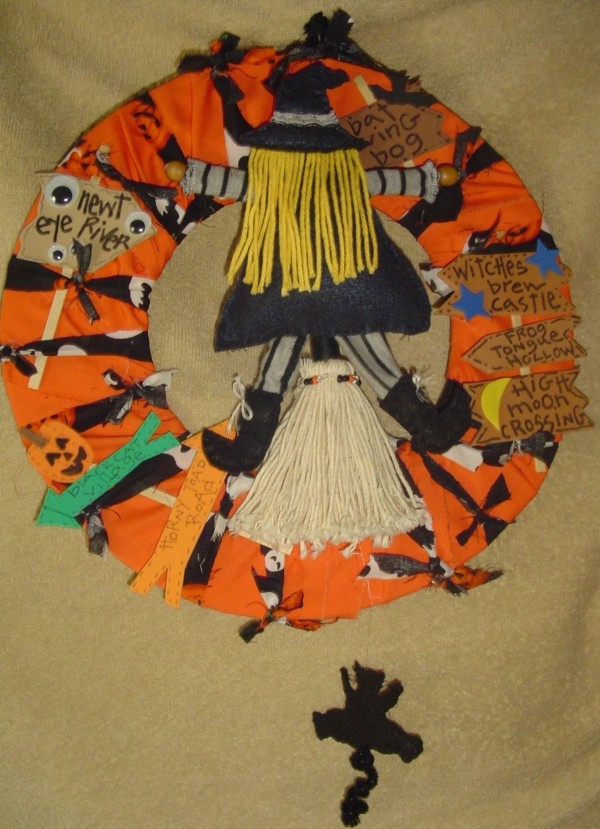
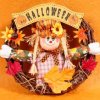
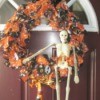
Poor Wanda the Witch just can't seem to find the right direction to go in and as you can see, she has already hit a dead end. Add some signs and help her get on the right path home. This wreath can be made by an older child and younger ones can help by making the signs. Kids can make the witch by gluing everything together instead of sewing.
Approximate Time: time will vary
Advertisement
Supplies:
material in Halloween colors - wreath
foam - signs
black marker - signs
wood coffee stirrers or craft sticks - signs
heavy, sturdy cardboard - wreath
sauce brush (1.00 at Dollar Tree)
3 pipe cleaners - witch + cat
yarn - witch
black felt - witch
striped material - witch
2 beads - witch
small amount of stuffing or cotton balls
Instructions:
Wreath:
The open center of your wreath needs to be of a size so that the top of the brush handle and some of the string at the bottom can lay on top of the cardboard. This is how you will attach the witch and broom to the wreath. My sauce broom was about 10 inches long, from the top of the handle to the bottom of the string so I made my inner circle opening about 7-8 inches big.
Advertisement
Try to find a lid or plate around your house that measures the size you need and trace around it on the cardboard. I used a paper plate.
Make the outer circle about 3 inches or 4 inches bigger.
Cut out your wreath.
Rip or cut your material into long strips. Start with one strip and glue or tape one end onto the wreath.
Start wrapping around the wreath, adding as many strips as it takes until you have no cardboard showing. You can add more strips if you want a fatter wreath. Put aside until later.
Signs:
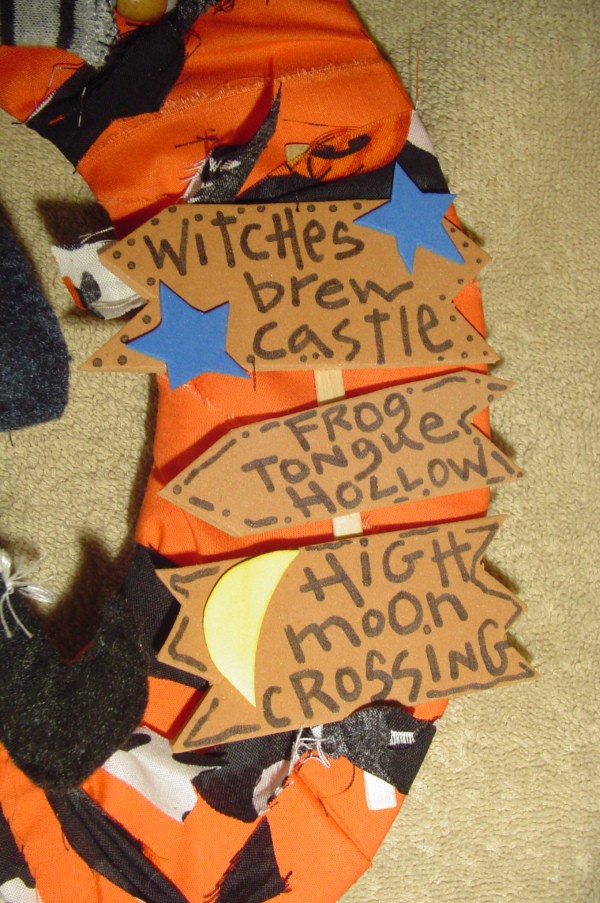
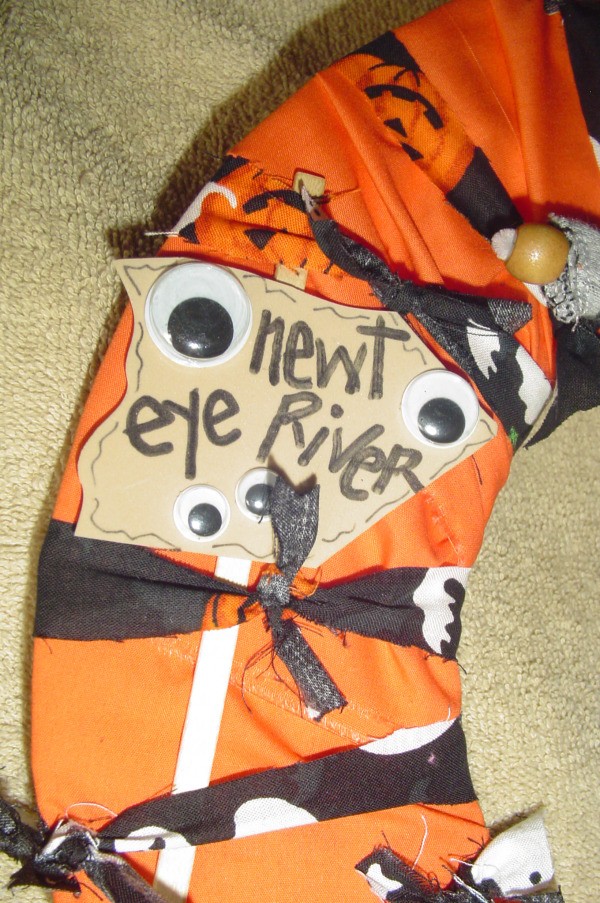
Cut out your own sign shapes or use the patterns and trace them onto foam.
Write names of funny or spooky places or use the ones in this project.
Cut out little shapes such as a star and moon and glue onto the signs wherever you want.
Advertisement
Glue the signs onto the sticks. Put aside until later.
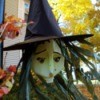
Witch:
Use the pattern pieces and cut 2 dresses, 2 hats, and 4 boots from black felt.
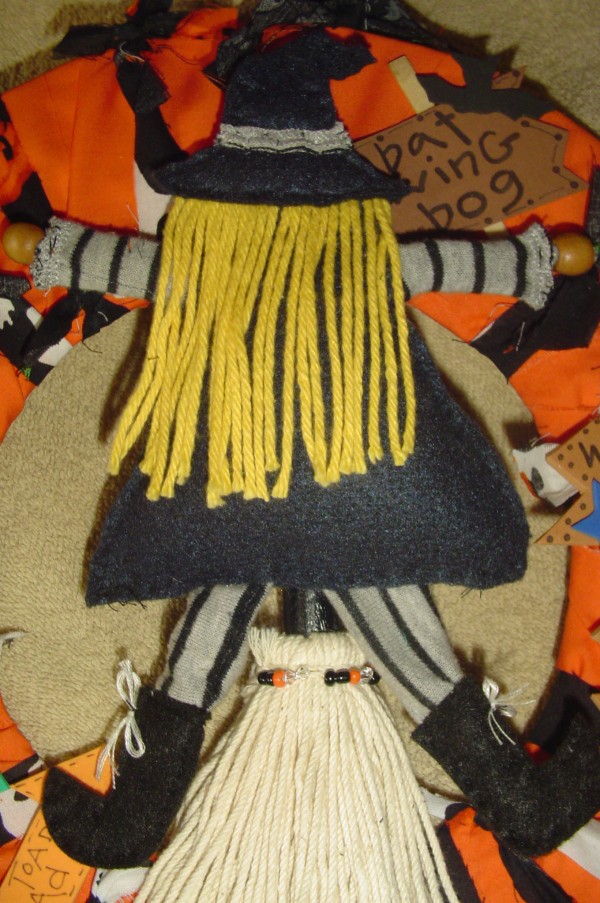
Cut several 6 inch pieces of yarn. You can cut them shorter later if you want. Glue them side by side along the bottom of one hat.
Stitch or glue both hat pieces together, being sure you have the glued yarn hair in between them.
Fold the hat over where the dotted lines are on the pattern and stitch down on hat.
You can glue or sew a small strip of material around the hat for a band, if desired (see picture). Put this piece aside for now.
Cut a 6 inch long piece of striped material about 2 inches wide. Fold in half length wise and stitch the long side together so that you form a tube, leaving both ends open.
Advertisement
Cut a piece of pipe cleaner about 2 inches longer than the tube and slide it in. Take a bead that you are using for hands and slip one on each end. Loop each end of the pipe cleaner over each bead and twist it so it stays closed. Tuck the ends inside the tube so they don't show. Put this aside for now.
Cut a 12 inch long piece of the same material about 3 inches wide. Also sew this into a long tube. Slide a pipe cleaner through this tube.
Take 2 boots and lay one end of the tube in between them and sew all around the boot, making sure you sew across the top well so that the leg stays inside the boot. Do the same for the other foot. Now bend the legs in the center so it looks like you have an upside down letter "V". Put the legs aside for now.
Take one dress piece and lay it in front of you so that the collar is at the top.
Take the arm tube (the one you made with the beads) and lay it across the dress, right under the collar. Lay the other dress on top and pin it all together.
Advertisement
You are going to sew the dress together, but do not sew across the bottom of it yet. Make sure you sew right through the arms when you get to them.
Stuff the dress lightly.
Take the tube with the boots and insert the top inside the dress. Pin across the bottom and sew it closed.
Lay the broom under the witch so it looks like she's riding it and make big whip stitches with black thread all the way down the handle and through the back of the witch to hold her on. Just sew through the back piece of her dress so it will not show in front.
You can string some small beads onto a piece of wire or pipe cleaner and wrap it around the neck of the broom if desired (see picture).
Attaching Witch to Wreath:
Advertisement
If your sauce broom has holes at the top of the handles, as mine did, slide a whole length of pipe cleaner through them. Poke two holes through the wreath on the top, a little above the inner circle and poke each end of the pipe cleaner through a hole.
Twist the ends tightly together in the back of the wreath and make a loop at the ends to hang the wreath from.
Glue some of the strings towards the back of the broom to the bottom below the center or you can sew them on right through the cardboard. If your broom does not have holes, you can glue both ends to the wreath.
Attaching Signs to Wreath:
Tear several thin strips of material. Don't worry if they don't rip straight. It's for Halloween and the more rough they look, the better.
Lay each sign around the wreath wherever you want them. Tie over the sticks with the strips of material to hold them on (see picture).
Tie on more strips here and there to fill in the wreath.
Cat:
Cut 2 cats using the pattern from black felt.
Curl a piece of black pipe cleaner for his tail.
Put it in between the cat bodies at the bottom and pin it together.
Use black thread and sew around all the sides. You can also make him some whiskers using thread.
Take some string or fishing line and thread it through at the top of the cat's head. Knot. Take other end and tie it to the wreath or under the strings of the broom so he hangs below the wreath.
Hang your wreath on a door so everyone can see what a great job you did!