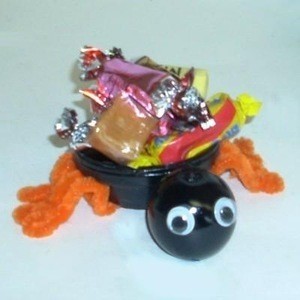
This small clay dish, bead, and chenille stems transform into a cute, mini spider with a body you can fill with candy! Great for Halloween parties.
Approximate Time: 15 minutes without drying time
Supplies:
- clay dish - 3 inches
- round bead - around 1-2 inches
- orange chenille stem - 2 - 18 inches long
- googly eyes - 2 - 1/2 inch
- craft glue
- black paint
- paintbrush
Instructions:
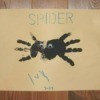
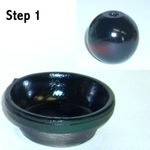
- Turn your dish upside down and cover it with black paint.
Let the paint dry. Turn the dish around again, so that it's facing the right way. Finish painting the dish black, making sure to get the inside and rim, as shown in the "Step 1" picture. Paint ball black. Let the paint dry.
- Fold your chenille stem in half evenly and cut. Repeat with other stem. Take the four stem halves and fold *them* into half evenly. Cut the stems. You should now have 8, small, even, orange stems.

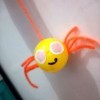
Make a small loop at the end of each orange stem, as shown in the "Step 2" picture. This is the spider's "foot" at the end of each "leg".
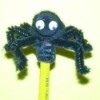
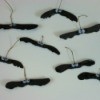
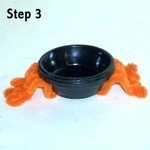
- The foot should go flat against the floor, with the leg arching up, then back down to slip under the spider's body. Use some craft glue to secure the legs to the spider's body. Place four legs on each side, coming from, under the spider, as shown in the "Step 3" picture. Bend each stem like a spider's leg, as shown in the "Step 3" picture.
- Glue googly eyes to black bead. Glue the head to front of body, as shown in the finished project picture. Let glue dry.
- Fill your dish with candy or other goodies and set out for guests.
By Aysha from Boise, ID

Add your voice! Click below to comment. ThriftyFun is powered by your wisdom!
Julie
Bronze Feedback Medal for All Time! 149 Feedbacks October 17, 20080 found this helpful
that is soooooooo cute!
October 17, 20080 found this helpful
What a cute idea. This would be cute to give the grandkids treats in. Then they could use if afterwards to keep other treats or goodies in. Also good project fot cub scouts or brownies. Thanks
October 18, 20080 found this helpful
that's just toooo cute! Thank you for the idea and posting the pics.
Add your voice! Click below to comment. ThriftyFun is powered by your wisdom!